The title here isn’t particularly relevant, I just never miss an opportunity to quote It’s the Great Pumpkin, Charlie Brown.
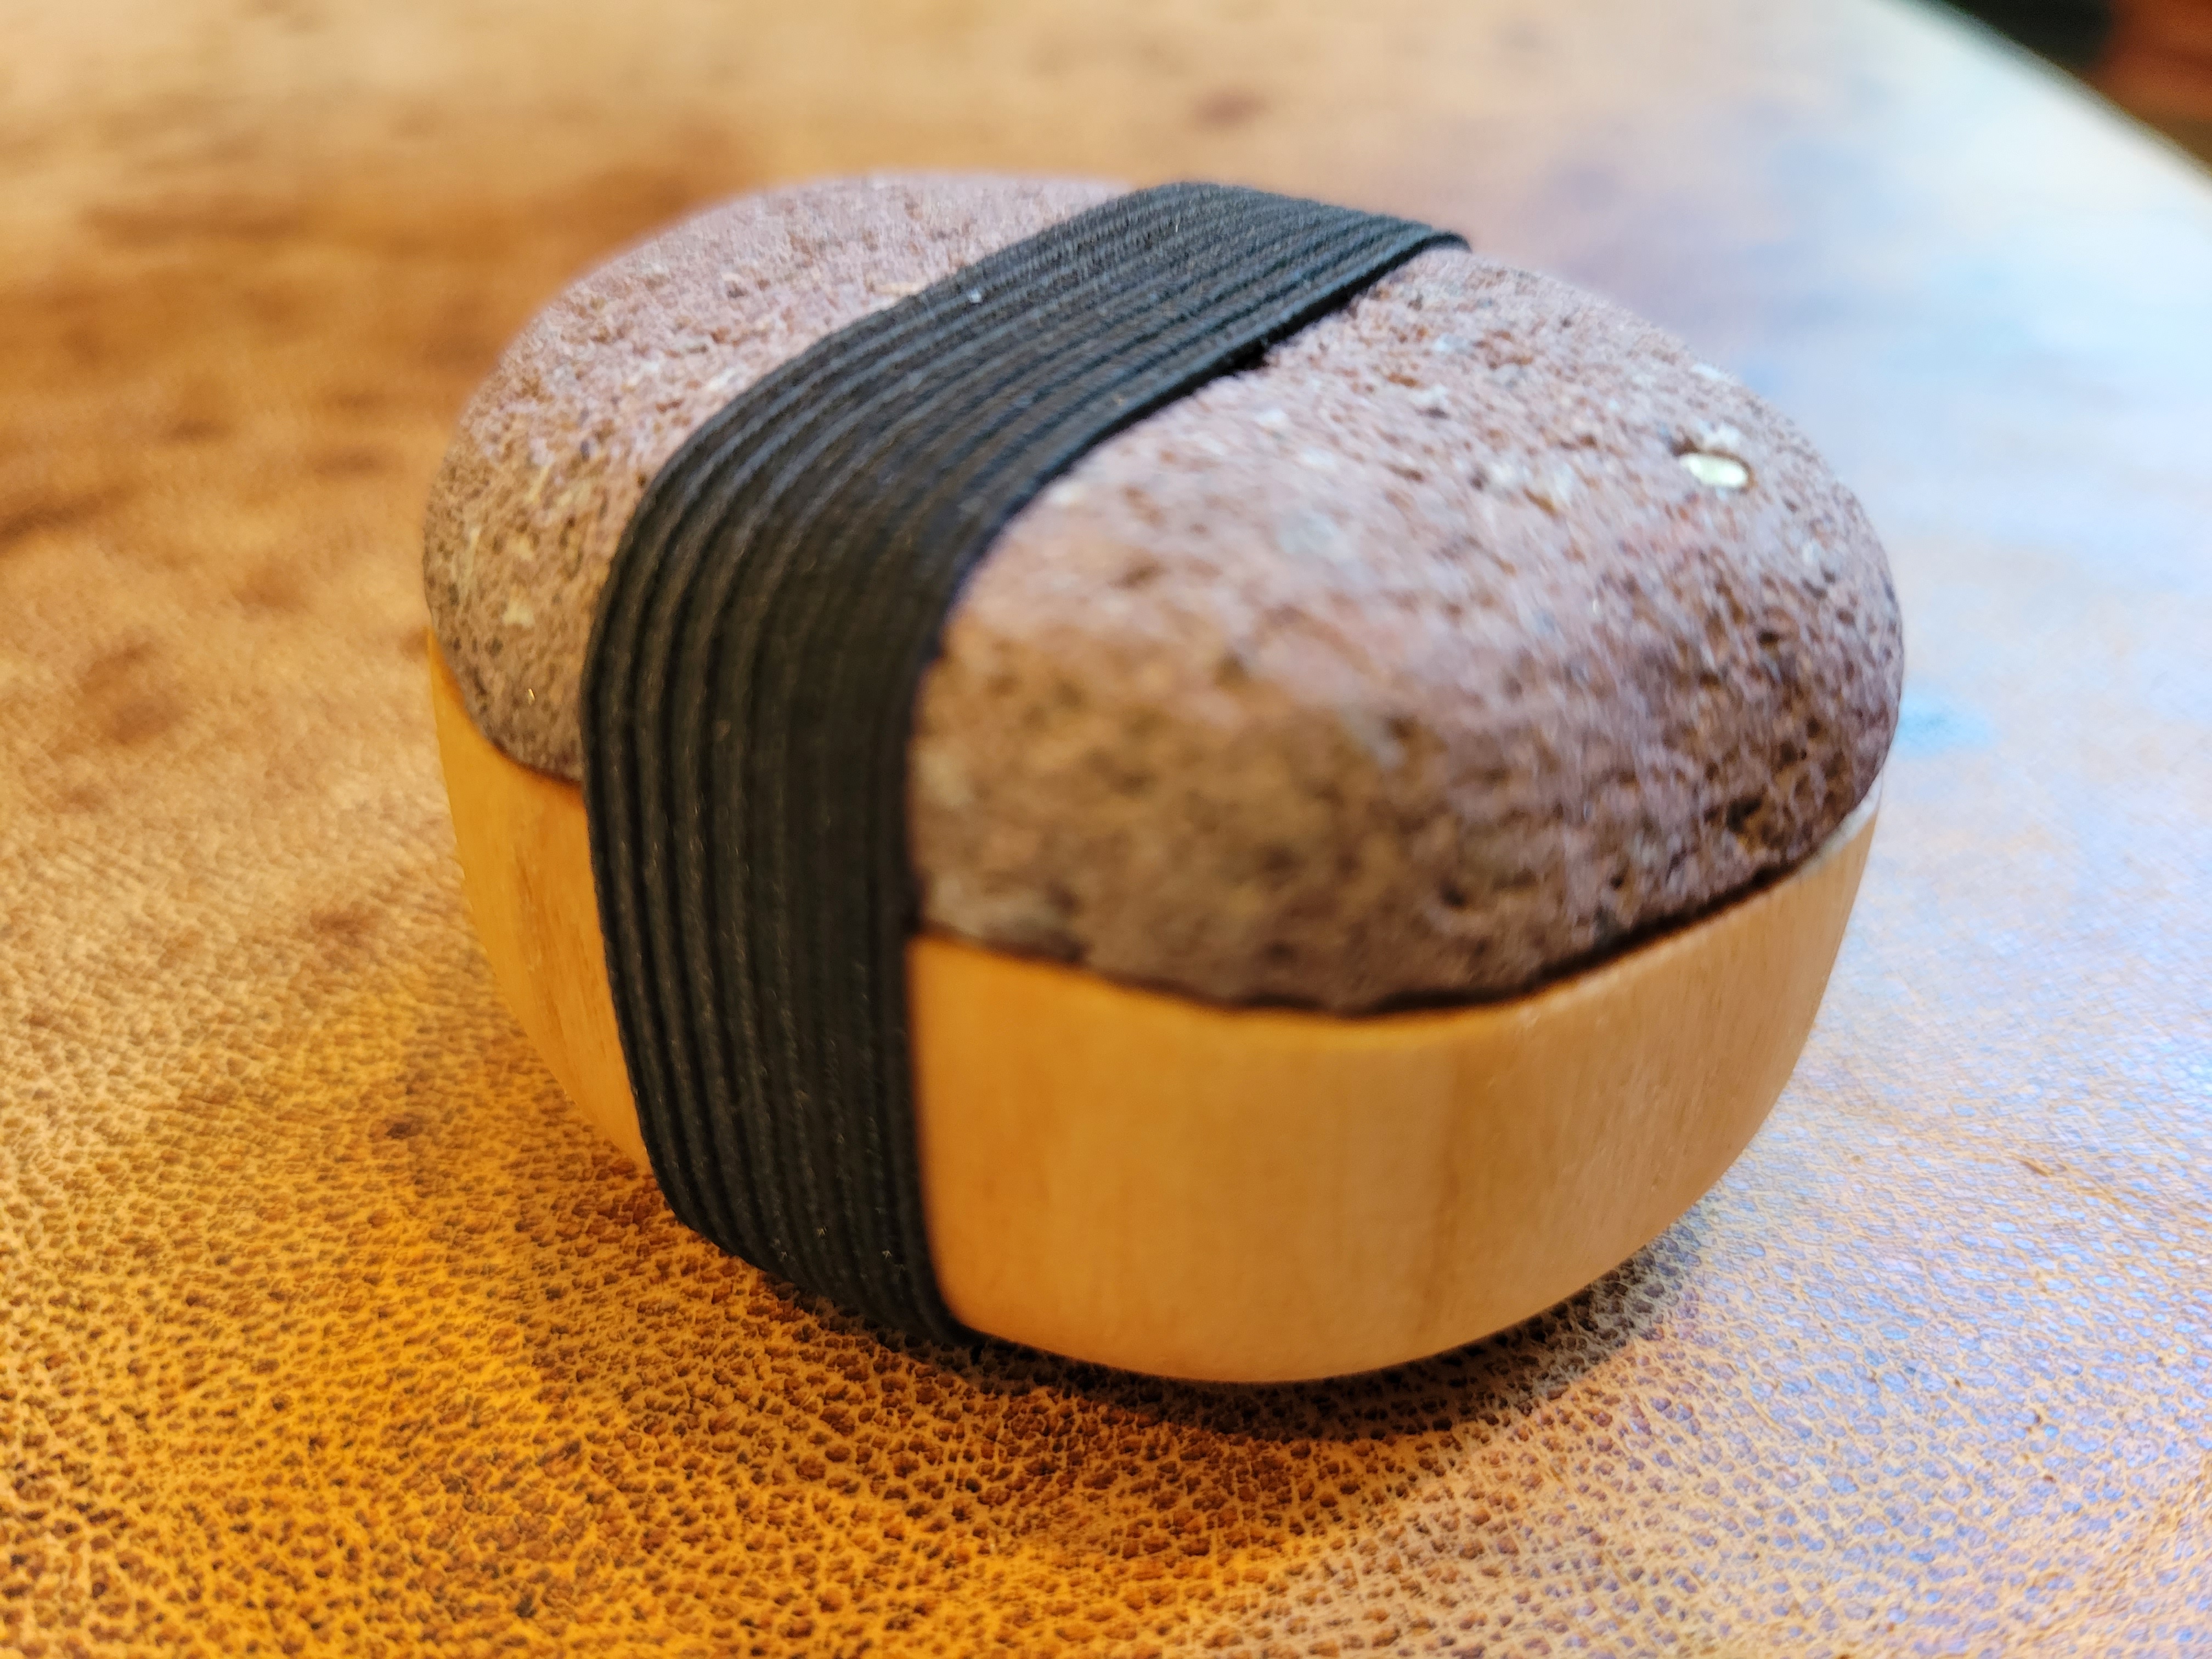
A few months ago, a friend sent me some pictures of cool stone-lidded ring boxes and asked if I thought I could make one for her daughter’s wedding. I was 100% not convinced I could, so gave myself a ton of outs but agreed to give it a shot. After a lot of stops and starts, I think the final result came out ok — fortunately she likes the “rustic” look! Loads of new materials and techniques which is always super fun.
The Rock
By far the most intimidating part of this build was the rock lid. The size and shape of the rock defines the piece — I wanted something with a nice texture and an uneven, rounded shape. It needed to be short vertically, kind of like a tall pancake, so that the fall of the edge blended seamlessly into the wooden box. I trolled around on the beach for awhile and found a few good candidates of various types and brought them into the garage.

OK, how to cut this thing on the horizontal? I’ve used my Dremel to bore rock but that was a non-starter here — the cut was too wide and along the thinnest part of the rock. I found a couple of well-reviewed diamond-edged blades for my trusty angle grinder, and set to work on a jig. It basically ended up as a mini-version of my chainsaw-slabbing jig, holding the blade horizontally above a supporting surface. The hardest part of these is safely moving the material through the blade while retaining all ten fingers. Push sticks and Kevlar gloves for the win!

Next lesson — some rocks are really hard. This should not have been a surprise, but especially with the awkward angle, crystalline pieces like quartz or granite were basically impossible to cut cleanly. The one I ended up with was (I think) well-weathered scoria … related to pumice but much denser and more solid. In the picture with the jig, you can see the little rectangular piece in the center left over after cutting the rock outside-in around each edge; I was able to remove that with a bunch of elbow grease and a diamond sanding pad which cleaned up the bottom nicely.
The Box
The red alder tree that fell on the beach a couple of winters ago has been my go-to for a ton of projects requiring clear wood — went back to that here too. I traced the rock top on a blank and rough cut the shape on the bandsaw, then basically carved and sanded until I had something that meshed into the top. Ideally I would have tapered the bottom edges more, giving the whole piece more of an egg shape, but I needed to preserve height so there was enough space inside the box for a ring.
Did I mention a lot of sanding to get this right?
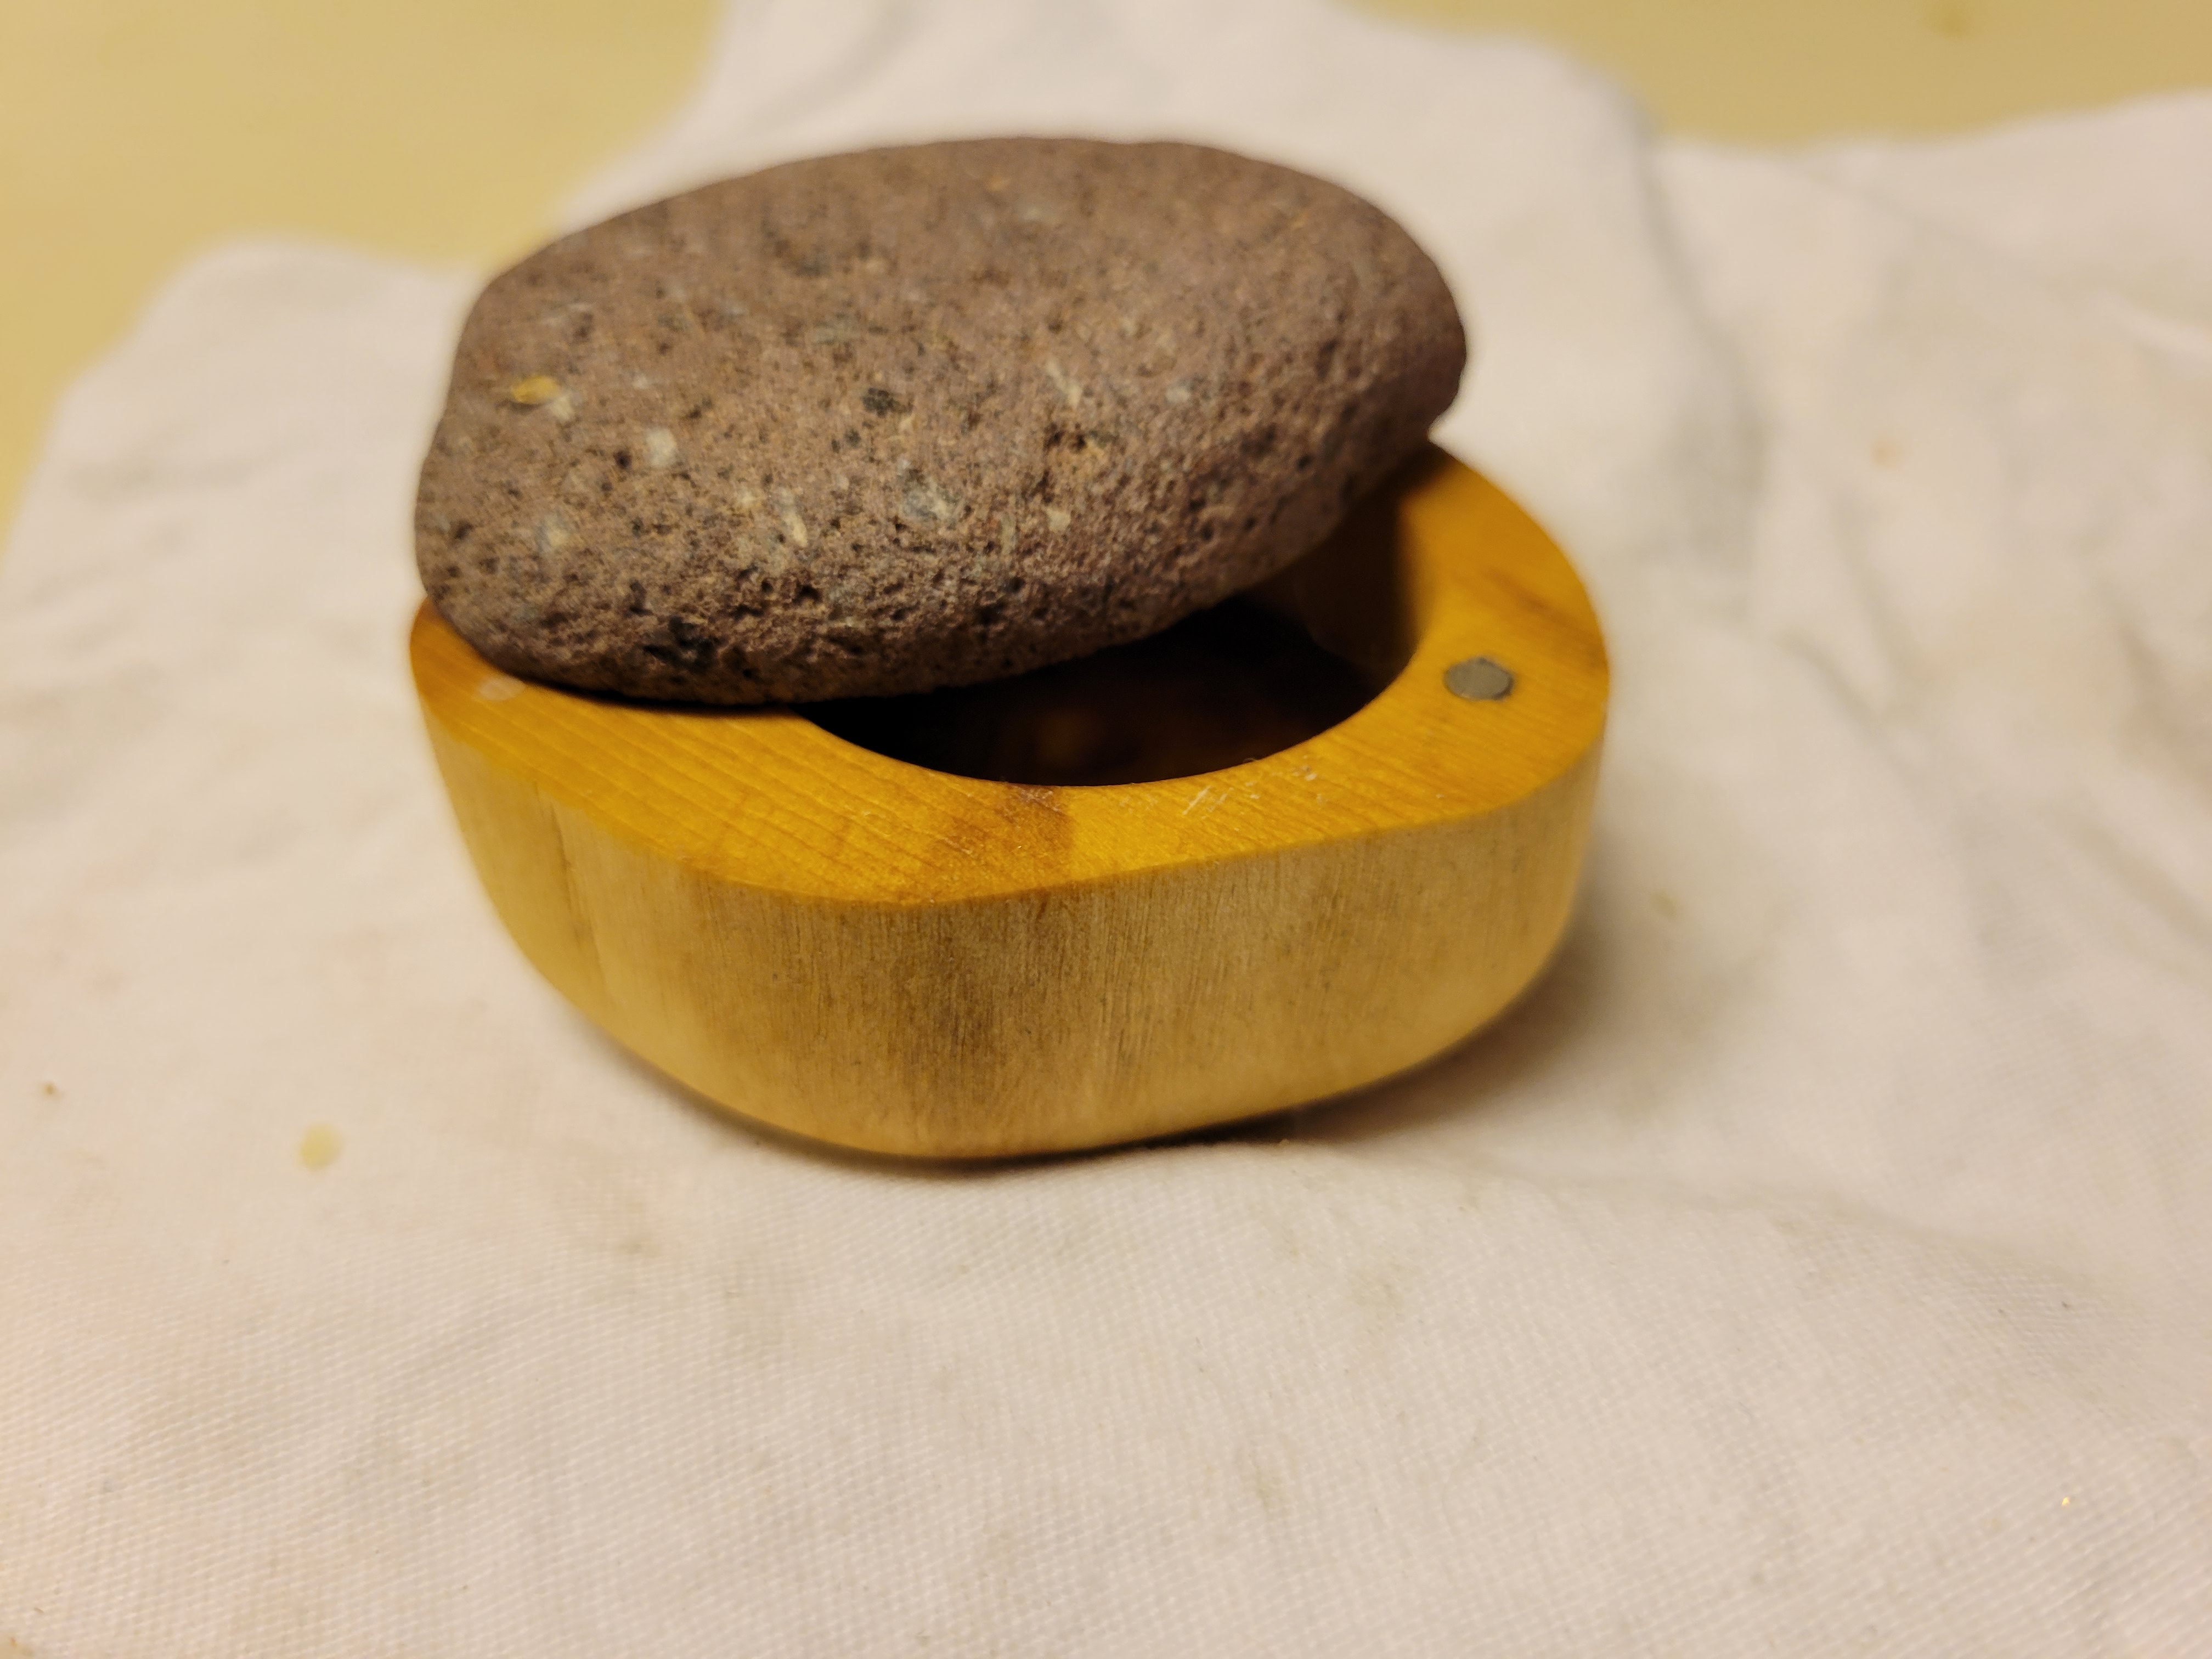
The space for the ring was pretty straightforward — just a 1-3/8″ hole with the drill press — but I was sweating it out convinced my box was either going to fly across the garage OR I was going to drill through the bottom by mistake. Happily neither of these things happened, and after a few applications of tung oil to bring out the alder color it was time for the really hard part.
Hinge and Closure
I now had a box and lid which fit together nicely. The plan was to attach the lid using a brass pin which was tight enough to hold things together but loose enough so that the lid could rotate open, exposing the ring nook. I also wanted to put a pair of small magnets on the opposite side so that it would “snap” closed to the right position. Seriously, I don’t know how people did this stuff before Amazon and the Internet.
The Dremel was the right tool this time; I have a bunch of diamond-tipped bits that go through rock and bored the pin hole and magnet divot nicely. Holding the piece under water reduced dust, and more importantly kept the bit cool so it lasts.

I always stress out about getting the opposite side of matching holes right. It was extra important here, since being off at all would offset the lid from the box — and the clean line between the two was the whole point of this exercise. I put black Sharpie on the bottom of a long pin, held the lid and box together, and pressed the pin through the lid onto the wood, making just enough of a mark to drill out its mate accurately. The same technique worked on the magnet pair too. Whew.
I glued the magnets into place, then cut the pin to length and glued it into the box. Lara had the great idea to coat the top of the pin with wax before sliding on the lid, which made it fit snugly and turn smoothly. I couldn’t believe my luck … it actually opened and closed and everything. WOOOOT!
Finishing Touches
I sure do love the Glowforge. Cut out a little circle of adhesive cork to fit into the ring nook, engraved with a script “A” for good measure, and things were looking pretty snappy. The last bit was a decorative elastic (loop closure sewed by Lara, thank you!) to hold it all more securely in a pocket or whatever.
This was definitely the most “mixed material” project I’ve done … it was a fun challenge to figure out how to shape and join everything. If I were to do another one, I think I’d use a slightly bigger rock for the lid … that would make it easier to create an egg shape without giving up vertical space for the nook. I’d also love to find a stronger magnet, but that is definitely a tradeoff of size vs. holding strength. The little guys do a surprisingly good job.
Once again I find myself enjoying the juxtaposition of larger-scale and smaller-scale work. I am pretty sure I’ll never get tired of this stuff. Until next time!