
In my first “crypto” post I covered a bunch of stuff, mostly in the abstract. All well and good — tons of new concepts to get a handle on — but it ain’t real until it’s running code. So that’s the task for today: build, deploy and run an Ethereum smart contract that does something at least marginally interesting. Things are going to get pretty wonky and probably a little boring if you don’t love code, but everyone is welcome to come along — embrace your nerd!
Round Robin Lotto

We’re going to build a contract I called “Round Robin Lotto” — the full source (there ain’t much) is on github in rrlotto.sol. RRLotto is a game that works like this:
- The system initializes a pseudo-random counter between 2 and 25.
- Accounts play the lotto by executing the “play” method of the contract and sending along .001 ether ($3.89 on mainnet as I write this).
- Each play decrements the counter by 1. When the counter hits zero, three things happen:
- The current player receives 95% of all ether in the contract account.
- The remaining 5% is sent to the “house” (the account that deployed the contract).
- The counter is reset to a new pseudo-random value between 2 and 25 (starting a new round).
The effect is more or less that of a 95% payout slot machine (albeit one with only a single prize). The jackpot will range from 0.0019 ether ($7.39 today) to 0.02375 ether ($92.43) based on the initial counter value for the round. Alert the IRS.
Running a lotto on Ethereum is interesting because (1) there is no true randomness on the blockchain and (2) all code and state data is public. If plays are infrequent, it would be easy for a sneaky actor to write code that waits until the counter is 1 and then plays immediately, winning every time. The trick is to set the maximum counter value roughly equal to the number of active players, making it very difficult to manipulate the order in which plays are processed / mined.
A better solution might be to run the pseudo-random generator on every play, and just use it to pay out with the desired frequency. The problem here is that our “pseudo-random” number is actually completely deterministic based on the current block difficulty and timestamp. Since miners set the timestamp, it’d be easy for them to pick timestamps that result in payouts to known accounts. Of course, this would be a ton of work spent to abuse our piddly little lottery — but it does highlight some of the unique quirks of writing for Ethereum.
And I guess you could also say that we don’t care too much anyways, since in all cases the house walks away with its 5%!
Writing for the EVM
Ethereum smart contracts run within a purpose-built virtual machine environment (the EVM). The “assembly” language of the EVM is a set of opcodes that look more or less as you’d expect. Nobody uses these to actually write code; there are high-level languages for that. Of these, the dominant one is Solidity, which looks a lot like C++ or Java; that’s what we’ll be using.
The primary construct in the EVM is the “contract”. Contracts as expressed in Solidity are just objects — they have constructors, methods and members, support multiple inheritance, etc.. What is quite unique about these contracts is their lifecycle on the blockchain:
- The Ethereum blockchain maintains the state of a single huge distributed EVM. All contract instances exist within this shared memory space.
- Contracts are instantiated by deploying them to the blockchain. The contract constructor is called during deployment to set up initial state. Really important: if you deploy the contract 3 times, you have created 3 distinct “objects” in the EVM — each with its own contract address and distinct internal state (in our case, running 3 completely independent lottos).
- Contract methods are called by sending a transaction to a contract address (just like dereferencing an object pointer). Contracts can use these “pointers” to call each other as well.
- All code execution happens within the context of a method call transaction. There are no background threads or scheduled events in the EVM.
- There is no parallel execution in the EVM. All code runs in one big single thread.
- Contracts can be destroyed when they are no longer needed. This doesn’t remove any of their state or transaction history of course, but it does free up some memory in the EVM and ensures that their methods can no longer be called.
It’s worth reiterating that each node holds every contract and its state in a single EVM instance. All of them run all of the contract-related transactions deployed to the blockchain (miners when creating blocks; validators as part of validating the resulting block states). This can be a little hard to wrap your mind around — the “world computer” is really a crap ton of copies of the same computer. This leads to more interesting quirks of the environment that we’ll see as we keep digging in.
Our contract in Solidity
There are a ton of solid “hello world” tutorials for Solidity; I’m not going to try to replicate that here. Instead, I’ll just walk through the bits and bobs of our contract so you can see how it all fits together. Maybe that ends up being the same thing? We’ll see. Remember that this code is on github; you may find it easier to load that up and see the fragments in context.
pragma solidity ^0.8.10;
While the EVM opcodes are pretty stable, the Solidity compiler and language are still moving relatively quickly. The pragma here with the caret says “I need to be compiled using at least version 0.8.10 but not 0.9.0 or higher.” This is kind of annoying, because probably 0.9.0 will be fine. At the same time, these contracts move real money and so I can see the benefit of being conservative.
contract RoundRobinLotto
This is the name of our contract. Solidity doesn’t care about file names matching this, and you can put multiple contracts into one file — I appreciate the lack of judgment here. This is where you specify inheritance using the “is” keyword (e.g., contract MyNewContract is SomeOtherContract).
address house;
uint countdown;
These are our member variables. house is an “address”; a built-in type that includes methods for working with its balance. We use it to remember the EOA account that deployed the contract and therefore receives the 5% commission. countdown is the pseudo-random pool size we talked about. “uint” is an unsigned 256-bit integer — I could have saved some gas here by using a smaller size (e.g., uint8) and you can also drop the “u” for a signed int (e.g., int32).
uint constant MAX_CYCLE = 25;
uint constant WEI_TO_PLAY = 0.001 ether;
uint constant HOUSE_PERCENTAGE = 5;
Constant variables are just language sugar to make code more readable and maintainable. Note the literal value “0.001 ether” — “ether” there is a keyword that automatically converts its value from ether to “wei”, which is the unit denomination of Ethereum transactions.
constructor() {
    house = msg.sender;
    resetCountdown();
}
Our simple, parameter-less constructor just sets member variables to their initial state. msg is one of a few global variables and functions that supply context or utilities; msg.sender holds the address of the account that initiated the current transaction (in this case, the account that initiated the contract deployment). The countdown member is initialized using the private function described next.
function resetCountdown() private {
    countdown = (uint(keccak256(abi.encodePacked(block.difficulty, block.timestamp))) % (MAX_CYCLE - 1)) + 2;
}
As noted earlier, the EVM doesn’t support true randomness. This makes sense when you think about the block creation protocol. If validation is going to succeed, every node must end up with exactly the same end state. For our purposes, “pseudo-random” works fine, and our private resetCountdown method takes an approach that’s pretty common in the Ethereum world — take some values that are deterministic but not easily predictable (the current network block difficulty and the current block timestamp), compute their hash and cast it to a 256-bit number, then use mod to reduce the result into the desired range. The Keccak256 hash computation is another one of those globally-available functions.
event Payout(address indexed to, uint amount);
This line defines an “event” that our code can emit as a notification when something notable occurs during execution. Events are stored within the transaction log (i.e., on the blockchain), and can be received by off-chain applications that subscribe using methods of a node’s JSON-RPC interface (we’ll talk a lot about the JSON-RPC interface in a bit). Since method return values are inaccessible to off-chain code, events are really the only way to send data back to the outside world.
function play() public payable {
    require(msg.value == WEI_TO_PLAY);
This is the first part of the method called by lotto players. It is marked public so that it can be called by external accounts, and payable so that it can receive ETH. “require” is a global function useful for enforcing conditions — in our case, verifying that the .001 ETH cost to play was sent along with the transaction.
if (--countdown > 0) {
    return;
}
resetCountdown();
payable(house).transfer(address(this).balance * HOUSE_PERCENTAGE / 100);
uint payout = address(this).balance;
payable(msg.sender).transfer(payout);
emit Payout(msg.sender, payout);
This second part of the play method is where the most interesting stuff happens. The first three lines just exit quickly when the countdown values remains greater than zero. Following that, we reset the counter, pay the house and the msg.sender, and emit our “Payout” event so that listeners can react if desired (e.g., by popping up a congratulations dialog box in the browser).
The ”payable” method casts variables of type “address” into a form that can receive ETH. The “transfer” method atomically transfers value between accounts. Either of these may cause an exception, in which case the transaction will be reverted and all value/state will be reset.
function destroy() houseOnly public {
    selfdestruct(payable(house));
}
This method calls the built-in method “selfdestruct” to destroy the contract, sending any remaining ETH balance to the house. The methods of destroyed contracts cannot be called, and the contract’s state is removed from the EVM. Of course all transaction and state history remains as part of the blockchain.
This function is marked public, but also with the nonstandard modifier “houseOnly”, described next:
modifier houseOnly {
    require(msg.sender == house);
    _;
}
Modifiers are commonly used like this to enforce prerequisites in a readable and resusable way. The method code is “wrapped” with the modifier code — the “_” marker indicates where in this process the method code should be inserted (so both pre- and post- method code can be written).
Compiling the contract
Before we can deploy our contract, we need to compile it into EVM opcodes. I love love love that the Solidity compiler is a single executable. You can install it with your package manager or whatever, but you can also just download one file and be good to go. Maybe it doesn’t take much to make me happy, but in a minute we’ll be using nodejs and it’s just the freaking worst by comparison. Anyways, go here and install solc for your system: https://docs.soliditylang.org/en/v0.8.10/installing-solidity.html.
Once that’s done, the compile is even simpler: solc --bin rrlotto.sol. Assuming you don’t hit any build errors, you’ll get a big binary string representing the compiled contract. Super cool!
Getting ready to deploy
The next step is to deploy the binary contract somewhere so that we can run it. This is the part in most Solidity tutorials where they tell you to use Remix, which is really very cool, but has a ton of under-the-covers magic built in. To help us really understand what is happening where, let’s take a closer-to-the-metal approach. First a few prerequisites — hang in there, it’ll be worth it!
Get some test ether
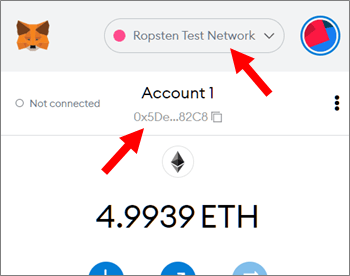
1 ETH on the actual Ethereum Mainnet goes for about $4,000 USD as of this writing, so we’ll be steering clear of that world. Instead we’re going to deploy on the Ropsten Test Network, where the ETH is free and the living is easy. The first step is to get some of that sweet fake ETH into an account under your control. There are tons of ways to do this; this was my approach:
- Add MetaMask to your browser. Set up your wallet, choose the Ropsten network and copy your account number. Important: While you can use the same MetaMask account on both Testnets and Mainnets, I don’t recommend it. I use a different wallet for “real stuff” and my MetaMask account only for testing and development.
- Visit a “faucet” site and request some free Ropsten ETH. I like this one; it drops 5 ETH per request which is way more than you’ll need for this exercise. It can take an hour or two for your request to float to the top of their queue; be patient!
- In MetaMask, under the “three dot” menu choose Account details / Export Private Key. Enter your password and copy the key; you’ll need this and your account number later.
Get access to a Ropsten node
Our code will work with any node. Running one yourself is semi-complex and deserves an article in its own right, so I suggest that you skip that for now and sign up for a free developer account at https://infura.io/. Once you’re signed in there, create a “project” to get direct access to their JSON-RPC endpoints. Whichever node you use, make sure you’re talking to the Ropsten network there as well.
Add some tools to your environment
We’re going to deploy and test our contract by interacting directly with the Ethereum JSON-RPC interface. I’ve used a few different tools to wrap this up in a set of bash scripts which require access to the following:
- A
bashenvironment (native on Linux or the Mac, WSL on Windows). curlfor making HTTP requests, installed with your package manager or from https://curl.se/download.html.jqfor working with JSON, installed from https://stedolan.github.io/jq/download/ (BTWjqis awesome and should be in your toolchest anyways)nodejsandnpminstalled with your package manager or from https://nodejs.org/en/. Hopefully your installation is less wonky than mine.- web3.js, installed once you have node with some variant of “
pip install -g web3”. I know, global is bad, blah blah blah. - The Ethereum bash scripts themselves from the shutdownhook github; clone the repo or just download the files.
The node and web3.js stuff is needed to support cryptographic signatures — getting signatures right is a finicky business and beyond what I wanted to attempt by hand in bash. Other than this, everything we do will be pretty straightforward and obvious.
Setup environment variables
Our deployment and test scripts rely on three environment variables. You can set these by hand at runtime, or add them to ~/.bashrc so that they’re always available. Note if we were using account details with value on a real production blockchain, I’d be recommending much tighter control over your account’s private key. With great power comes great responsibility.
export ETH_ACCOUNT=0x11111111111111111111111111111111
export ETH_PK=0x2222222222222222222222222222222222222222222222222222222222222222
export ETH_ENDPOINT=https://ropsten.infura.io/v3/00000000000000000000000000000000
The endpoint example above assumes you’re using the https://infura.io/ nodes; the zeros will be replaced by your project identifier shown on their dashboard. ETH_ACCOUNT and ETH_PK are as copied out of MetaMask or your chosen test ETH wallet.
The Ethereum JSON-RPC interface
Most of the blockchain stuff you read about is what happens “on-chain” — how blocks are assembled and mined, how transactions move value around, the EVM operations we detailed earlier, etc.. But none of that happens in a vacuum; it’s all triggered by real-world (“off-chain”) actions using an external API that bridges the two worlds. For Ethereum, this is the JSON-RPC interface exposed by every node on the network.
Nodes expose JSON-RPC over HTTP or WebSockets, typically tied to localhost to prevent unwanted access. “Unwanted” is the operative word here, because for the most part security over the interface isn’t an issue. Transactions are signed before being sent to the node, so private keys never exist on-chain. And all data in the chain is public by definition, so what is there really to protect? Three things to consider: (1) DoS or other attacks at the network level could impact your node’s performance; (2) accepting transactions does use some network and compute resource that you’re presumably paying for; (3) many node implementations DO allow you to configure private keys locally so that you can use functions like eth_sendTransaction for specific accounts without signing on the client side. This last is the source of much confusion and, while I get the convenience factor, it just seems like a bad idea.
HTTP requests to the JSON-RPC interface consist of a POST with a JSON body that identifies the method to call and parameters to send. For example, the following curl command will fetch the current network “gas price”:
$ curl -s -X POST -H "Content-Type: application/json" --data '{"jsonrpc":"2.0","method":"eth_gasPrice","params":[],"id":1}' $ETH_ENDPOINT
{"jsonrpc":"2.0","id":1,"result":"0x5968313b"}
The format of the “result” field depends on the method called; in the case of eth_gasPrice the return value is the current price of gas in wei, expressed as a hexadecimal number. This request is packaged up in the eth-gasprice script with a slightly more useful output format:
$ ./eth-gasprice
WEI:  1500006255
GWEI: 1.500006255
ETH:  .000000001
Methods like eth_gasPrice are easy because the data package doesn’t need to be signed. In similar fashion, eth-nonce will return the transaction count for your account (probably zero at this point) and eth-version will just return some info about the software running on your node.
Submitting Transactions via JSON-RPC
Transactions are a little more complicated, in two ways. First, the data package needs to be signed, which we accomplish with the eth-signtx script. This script is a bit of a cheat; we use nodejs to load up the web3.js library and just call its internal method rather than doing it ourselves. Before you give me too hard of a time here, go poke around and you try to make it work in bash alone. 😉 This is the forever story of crypto development: the math to compute hashes and signatures is complex but really not a big deal, but the “setup” to get all of the input bytes in exactly the right format is always finicky black magic. A single bit in the wrong place renders your output useless to the rest of the network. So except in some really simple or really ubiquitous situations, better to just rely on an existing implementation.
The second issue comes from the asynchronous nature of transaction execution. A successful transaction submission returns its “transaction hash”, a handle that you can use to query its status. It can take anywhere from a few seconds to a few minutes for a miner to actually pick up the transaction and get it into a block, and even longer for that block to get enough “confirmations” to be confident that it’s golden.
The eth-sendwei script shows how this works for a simple transaction that just sends ether from one account to another (no smart contracts involved). There’s no law against sending your own ether to yourself, so you can try it out like this:
$ ./eth-sendwei $ETH_ACCOUNT 1000000000000000
Transaction Hash is: 0x84015099d0c6cf6edbe0902257d7b95b51fa47f296b46ad2a8c6f83a470fdf2b
waiting...
waiting...
{
  "jsonrpc": "2.0",
  "id": 1,
  "result": {
    "blockHash": "0xfc47ee3dd2b233996309cfb7b38dac02b793d1117a9731041acbe0efe7a19846",
    "blockNumber": "0xb186a8",
    "contractAddress": null,
    "cumulativeGasUsed": "0x1593e7",
    "effectiveGasPrice": "0x5b3a1690",
    "from": "0x5de0613c745f856e1b1a4db1c635395aabed82c8",
    "gasUsed": "0x5208",
    "logs": [],
    "logsBloom": "0x00000000000000000000000000000000000000000000000000000000000000000000000000000000000000000000000000000000000000000000000000000000000000000000000000000000000000000000000000000000000000000000000000000000000000000000000000000000000000000000000000000000000000000000000000000000000000000000000000000000000000000000000000000000000000000000000000000000000000000000000000000000000000000000000000000000000000000000000000000000000000000000000000000000000000000000000000000000000000000000000000000000000000000000000000000000",
    "status": "0x1",
    "to": "0x5de0613c745f856e1b1a4db1c635395aabed82c8",
    "transactionHash": "0x84015099d0c6cf6edbe0902257d7b95b51fa47f296b46ad2a8c6f83a470fdf2b",
    "transactionIndex": "0xd",
    "type": "0x0"
  }
}
The script returns as soon as the block has been mined. “Confirmations” is a term defined as the count of blocks mined since the one your transaction is in; this is captured in the eth-confirmations script (the number will continue to grow as more blocks are mined):
$ ./eth-confirmations 0x84015099d0c6cf6edbe0902257d7b95b51fa47f296b46ad2a8c6f83a470fdf2b
2

$ ./eth-confirmations 0x84015099d0c6cf6edbe0902257d7b95b51fa47f296b46ad2a8c6f83a470fdf2b
6
Wait, what’s that “gas” business?
If you look at the Etherscan transaction details for the transaction above, you’ll note a transaction fee of 0.00003214120392 ether — sending .001 ether from ourselves to ourselves cost us some (fake) money! This amount is paid as a “gas fee” to the node that mines the block our transaction lives in. “Gas” is the resource that makes the Ethereum blockchain work, and it can add up quickly, so it’s important to understand.
First the nuts and bolts. Every Ethereum action is assigned a cost in “units of gas” — e.g., sending ether from one account to another costs 21,000 gas. It costs a certain amount of gas to run each EVM opcode and to store state data in EVM memory. The more code and the more memory, the more gas is consumed. This enables the network to assess the resource cost of running a transaction, which is very important given the Turing-complete nature of the EVM. I could write a method in a smart contract that runs for hours or days — obviously there has to be a way to recoup those costs and prevent bad code from taking over the whole blockchain.
Gas is paid by the submitter of a transaction to the miner that performs the work involved in it. At any given point in time, gas has a price in ether — this number is pure supply and demand, dependent on how many miners are working and how many transactions are running. Actually, even this price is kind of a fiction — when a user submits a transaction, they just say what price they are willing to pay per unit of gas, and miners decide if that price is worth their time. A user can offer zero and maybe some miner will feel charitable, or they can offer a ton of ETH and have miners jump at the opportunity. The “current” gas price is just what the collective market considers reasonable at a point in time.
Transactions are also submitted with a maximum number of gas units the submitter is willing to spend. If the transaction “runs out of gas” before it is completed, an exception is thrown and the transaction is reverted. This is obviously suboptimal, and any unused gas is returned to the submitter, so generally people submit a much higher max value than they expect to be used.
As noted above, value transfers always cost 21,000 gas — but how do you even begin to make an estimate for smart contract code? This really is still a bit of an art — but there are two tools that can help. The solidity compiler can perform static analysis to estimate gas use:
$ solc --gas rrlotto.sol
======= rrlotto.sol:RoundRobinLotto =======
Gas estimation:
construction:
   infinite + 260600 = infinite
external:
   destroy():   32022
   play():      infinite
internal:
   resetCountdown():    infinite
There are a couple of interesting things here. First notice the “infinite” (really should be “unknown”) values — solc is extremely conservative about making estimates. In the resetCountdown method, we perform calculations based on the current block difficulty and timestamp. Since those can’t be known ahead of time, solc just punts, and that bubbles up to the other methods that call resetCountdown. Some of these “punts” are unavoidable in static analysis — others I think just reflect the fact that nobody has really worked too hard on this particular feature yet.
The other thing is that the cost for construction is presented as two numbers. The first one is the cost of execution (infinite as far as solc is concerned), and the second is the cost of state storage in the EVM. Our two values (house and countDown) will cost 260,600 gas to store. Keeping state can get really expensive in Ethereum; it’s definitely in your best interest to use as little as possible.
You can also use the eth_estimateGas JSON-RPC method to estimate the gas needed by a transaction (you can see this call in the eth-estimate-tx script). In this case the transaction is actually “dry-run” in an isolated EVM on the node, without impacting blockchain state, and the actual amount of gas consumed is returned. On the surface this seems like the obvious winner — it’s an exact calculation after all. But not so fast! Depending on the state of the EVM, costs can change significantly. Take for example the play() method in RRLotto … most of the time it decrements a counter and exits quickly. But once in awhile, it executes transactions, emits an event and computes new hash values. In order to be safe, you’d need to call eth_estimateGas with the “worst case” inputs and starting state. That’s not always a simple thing to figure out … so gas estimation remains a fuzzy art.
Finally! Let’s deploy some code
We finally have all the pieces we need to deploy RRLotto to the blockchain. We just need to construct a transaction with:
- The “to” field set to null — the null address is a special case address that means “please deploy this smart contract”.
- The “data” field set to the binary version of our compiled contract, as output by
solc. If your constructor has parameters, this gets a little more complicated. This article does a remarkable job of explaining the details, but I haven’t included that in my scripts yet.
We also need a gas estimate — between solc and eth_estimateGas it looks like we’ll use about 360,000 gas for our constructor and storage. We’ll set a max to 500,000 just to be safe.
The eth-deploy script puts all of this together:
$ ./eth-deploy ../rrlotto/rrlotto.sol 500000
Transaction Hash is: 0x246ba2c89621a63aa49e9a6f3b5de75e60edea6d1132ed9fa187760cc73f9a1d
waiting...
waiting...
{
  "jsonrpc": "2.0",
  "id": 1,
  "result": {
    "blockHash": "0x66715659b4672729f59710b7b5db81d37ad342d26a98fc364176ec328ed5b742",
    "blockNumber": "0xb18a63",
    "contractAddress": "0xe588f20df3c5dad47d66722c2d6c744d3a41593c",
    "cumulativeGasUsed": "0x42e496",
    "effectiveGasPrice": "0x59682f07",
    "from": "0x5de0613c745f856e1b1a4db1c635395aabed82c8",
    "gasUsed": "0x5e701",
    "logs": [],
    "logsBloom":
0x00000000000000000000000000000000000000000000000000000000000000000000000000000000000000000000000000000000000000000000000000000000000000000000000000000000000000000000000000000000000000000000000000000000000000000000000000000000000000000000000000000000000000000000000000000000000000000000000000000000000000000000000000000000000000000000000000000000000000000000000000000000000000000000000000000000000000000000000000000000000000000000000000000000000000000000000000000000000000000000000000000000000000000000000000000000",
    "status": "0x1",
    "to": null,
    "transactionHash": "0x246ba2c89621a63aa49e9a6f3b5de75e60edea6d1132ed9fa187760cc73f9a1d",
    "transactionIndex": "0xb",
    "type": "0x0"
  }
}
We did it! Our new contract is deployed at the “contractAddress” 0xe588f20df3c5dad47d66722c2d6c744d3a41593c — use this link to see details of what happened:
- We paid .00058 ether as a transaction fee.
- The miner at 0x68268… received that transaction fee.
- The new contract at 0xe588… was created with a 0 ETH balance.
Click the little “down arrow” icon next to the contract address to see the state of storage in the contract. Storage address 0x0 holds the house address and you can see it equals my account. Address 0x1 holds the countDown value and in this case was initialized to 16 (0x10).
It took awhile to get here, but this is a pretty neat milestone. Our smart contract is deployed and active on an actual blockchain. Sure it’s the test network, but the only thing standing between us and Mainnet is about $97 in gas fees (386,817 gas x 63 gwei/gas x $3,984.07 USD/ETH). Have I mentioned that gas is kind of expensive?
That bears repeating — there is nothing stopping us from launching that contract on the Ethereum mainnet other than $97. We don’t need anybody to approve our account, or set up a monthly hosting contract, or anything — it’s just there, live, and completely anonymous managing real money. This is both super-cool and a little unsettling at the same time … no training wheels!
Calling contract methods
With the contract deployed, we can actually play the lotto. Of course, we could do that by submitting a transaction using the JSON-RPC interface — that code is in the play-rrlotto script. But if this web3 thing is going to go anywhere, I’m pretty sure that bash scripts aren’t going to be the ux that makes it happen. Instead, let’s build an actual web site that lets us play. The code for this is in rrlotto.html; hosted here if you want to give it a try live. As always, be prepared to have your mind blown by my web design skills.

The bridge that enables normal web pages to use smart contracts is the humble browser plugin — in our case MetaMask, the wallet application we used earlier to set up our test account. MetaMask and other browser-based wallets “inject” a javascript object (window.ethereum) into every web page you visit. Web developers can access this object from code on their pages, calling smart contract methods, initiating value transactions, and so on. It’s a pretty smooth trick actually.
The window.ethereum object is typically wrapped up in another javascript library to make it easier to use. Web3.js that we saw earlier is the granddaddy of these. For the lotto page I’ve chosen to use ethers just to give you a look at a second (but mostly equivalent) approach. It’s important to be clear on the difference between all of these things:
window.ethereumis provided by a browser plugin according to the EIP-1193 standard. It basically makes the JSON-RPC methods accessible to javascript on a web page (it turns out that MetaMask by default passes them through to the same infura.io nodes that we’ve been hitting directly).- The software that implements this standard is almost always (and certainly in the case of MetaMask) also a wallet, which has the job of holding account private keys — it isn’t essential that they be the same thing, but it makes web development easier.
- A third-party javascript library like web3.js or ethers is usually used to make accessing
window.ethereummethods simpler. This is purely for developer convenience — while not pleasant, it would be 100% possible to call smart contracts without it.
OK, let’s get down to it. Our page consists of a button (#playButton) and a div to display messages (#output). When the user clicks the button, the first thing we do “wire up” all the Ethereum pieces in connectEthereum starting at line 38:
- If we’ve already gone through all of this, just bail out — we’re ready to go.
- If the window.ethereum object doesn’t exist, it means the user hasn’t installed an Ethereum plugin — nothing more we can do.
- Call the eth_requestAccounts method. MetaMask prompts the user to allow the page access before returning an “unlocked” account number.
- Set up the ethers objects we’ll use to call the contract later on. Notice the “abi” parameter we pass when creating the Contract — ethers needs this metadata to be able to format method call transactions properly. We generated the abi structures using solc with the –abi parameter (
solc --abi rrlotto.sol). - Attach an event processor to the contract that displays a message to the user when a payout occurs. Remember that method calls made by an EOA (account for a user) can’t see return values directly, so events like this are the primary way that on-chain data comes back our way.
Next at line 66 we do a quick check to verify that MetaMask is configured to use the Ropsten network where our contract is deployed (a list of these identifiers can be found at https://chainlist.org/), and then finally at line 74 we attach our signing provider (with our private key ready to sign transactions) to the contract, call the play() method and wait for it to complete:
var superContract = contract.connect(signer);
tx = await superContract.play({ value: weiToPlay });
log("waiting...<br/>transaction hash is: " + tx.hash);

await tx.wait();
log("transaction complete! <a target='_blank' href='https://ropsten.etherscan.io/tx/" + tx.hash + "'>view on etherscan</a>");
Before calling the method (and sending ETH to the contract!), MetaMask prompts the user for confirmation, providing some guidance on how much gas to send along. On the one hand this flow is amazing and cool — on the other it’s a ux disaster. I’m sure it’ll get worked out over time, but for now grandma ain’t gonna be playing our lotto.
The transaction proceeds asynchronously on the blockchain — on our page we disable the “play” button and wait for confirmation, but the browser overall is ready to do other stuff. When the transaction completes, MetaMask shows an alert dialog and our page comes back to life, ready to play again. Anytime a payout occurs, the event fires and our handler displays a message. Woo hoo!
We made it!
Whew — that was a lot. We wrote and compiled a real smart contract in Solidity, figured out enough about gas fees to know how much it would cost to deploy, called the JSON-RPC interface to deploy the contract, and finally called it from a regular old web page using MetaMask and its Ethereum provider. We wrote in a bunch of languages across a ton of distributed services. I hope it all made sense. If you get stuck please let me know, I’d be happy to help out if I can.
The question I’m left with is … in a world where I’m pretty sure the chains fall over at some point — beyond being an awesome nerdfest, does any of this matter? Will “web3” become a meaningful part of our world, or will it fade away after making a few folks richer and a lot of folks poorer? Still not sure, but I must say I’m enjoying the ride. Until next time!